- Section Accounting agenda – Personal accounts – select the user.
- Check the expenses that are to be private (box to the right of the expense).
- Click on
 (bottom right) and select Close Expenses as Private.
 - Confirm by clicking Close as private.
- Section Accounting agenda – Personal accounts – select the user.
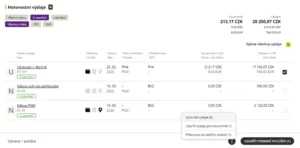
- Tick the items you want to move (box to the right of the expense).
- Click on (bottom right) and select Move to next period.
- Section Accounting agenda – Personal accounts – select the user.
- Scroll all the way down or click the Moved to next period tab.
- Select View and click
 to return the expense to the current accounting period.

- Section Accounting agenda – Personal accounts – select the user.
- Find the item you want to reopen and click .
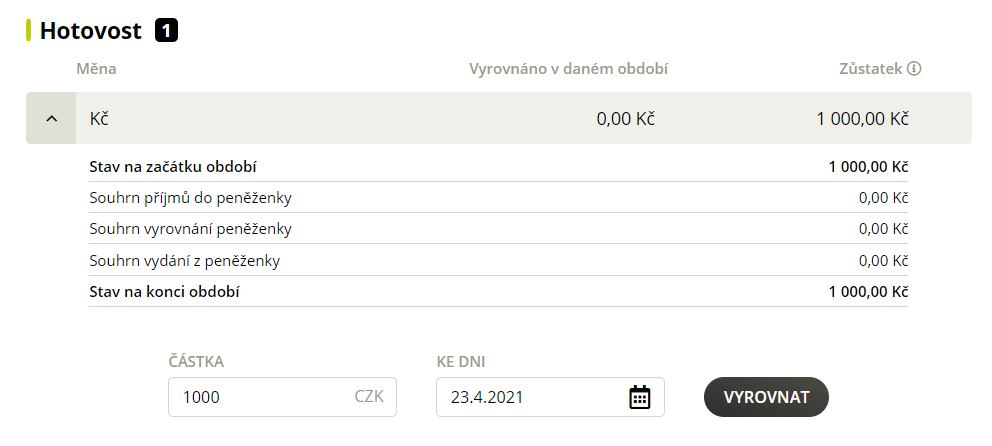
- Section Accounting agenda – Personal accounts – select the user.
- Scroll down or click on the Cash tab.
- Enter the date and select Align All.
or click on ![]() , enter the amount and date and select Settle.
, enter the amount and date and select Settle.
- Section Accounting agenda – Personal accounts – select the user.
- Scroll down or click on the Cash expenditures tab.
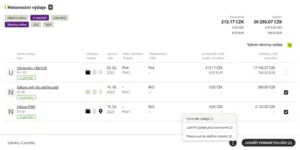
- Tick the expenses to be offset (box to the right of the expense).
- Click on
(bottom right) and select Balance expenses.
- Confirm with the Align button.

The balanced expenditure can be found in the Wallet Settlement Summary. Here you also have the option to undo the expense settlement by clicking on . It is possible to return the expenses individually – each balanced expense is listed here on a separate line.
Click on Reconcile to reconcile the expenditure in the amount on the date specified.
- Section Accounting agenda – Personal accounts – select the user.
- Check that all items are in the Closed state.
- Select Close entire settlement (top right) and confirm with the Close settlement button.

- Section Accounting agenda – Personal accounts – select the Personal accounts you want to export.
- Click on (top right) and select Download PDF.
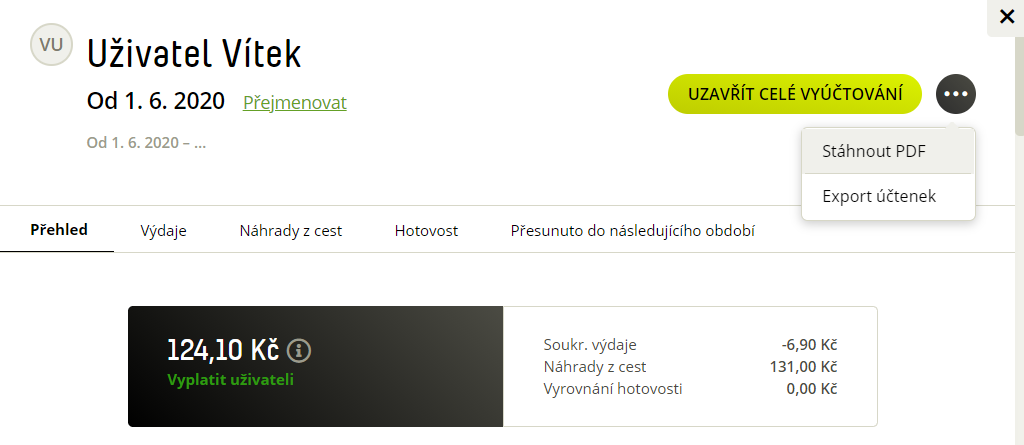
- Section Accounting agenda – Personal accounts – select the Personal accounts you want to export.
- Click on (top right) and select Export receipts.
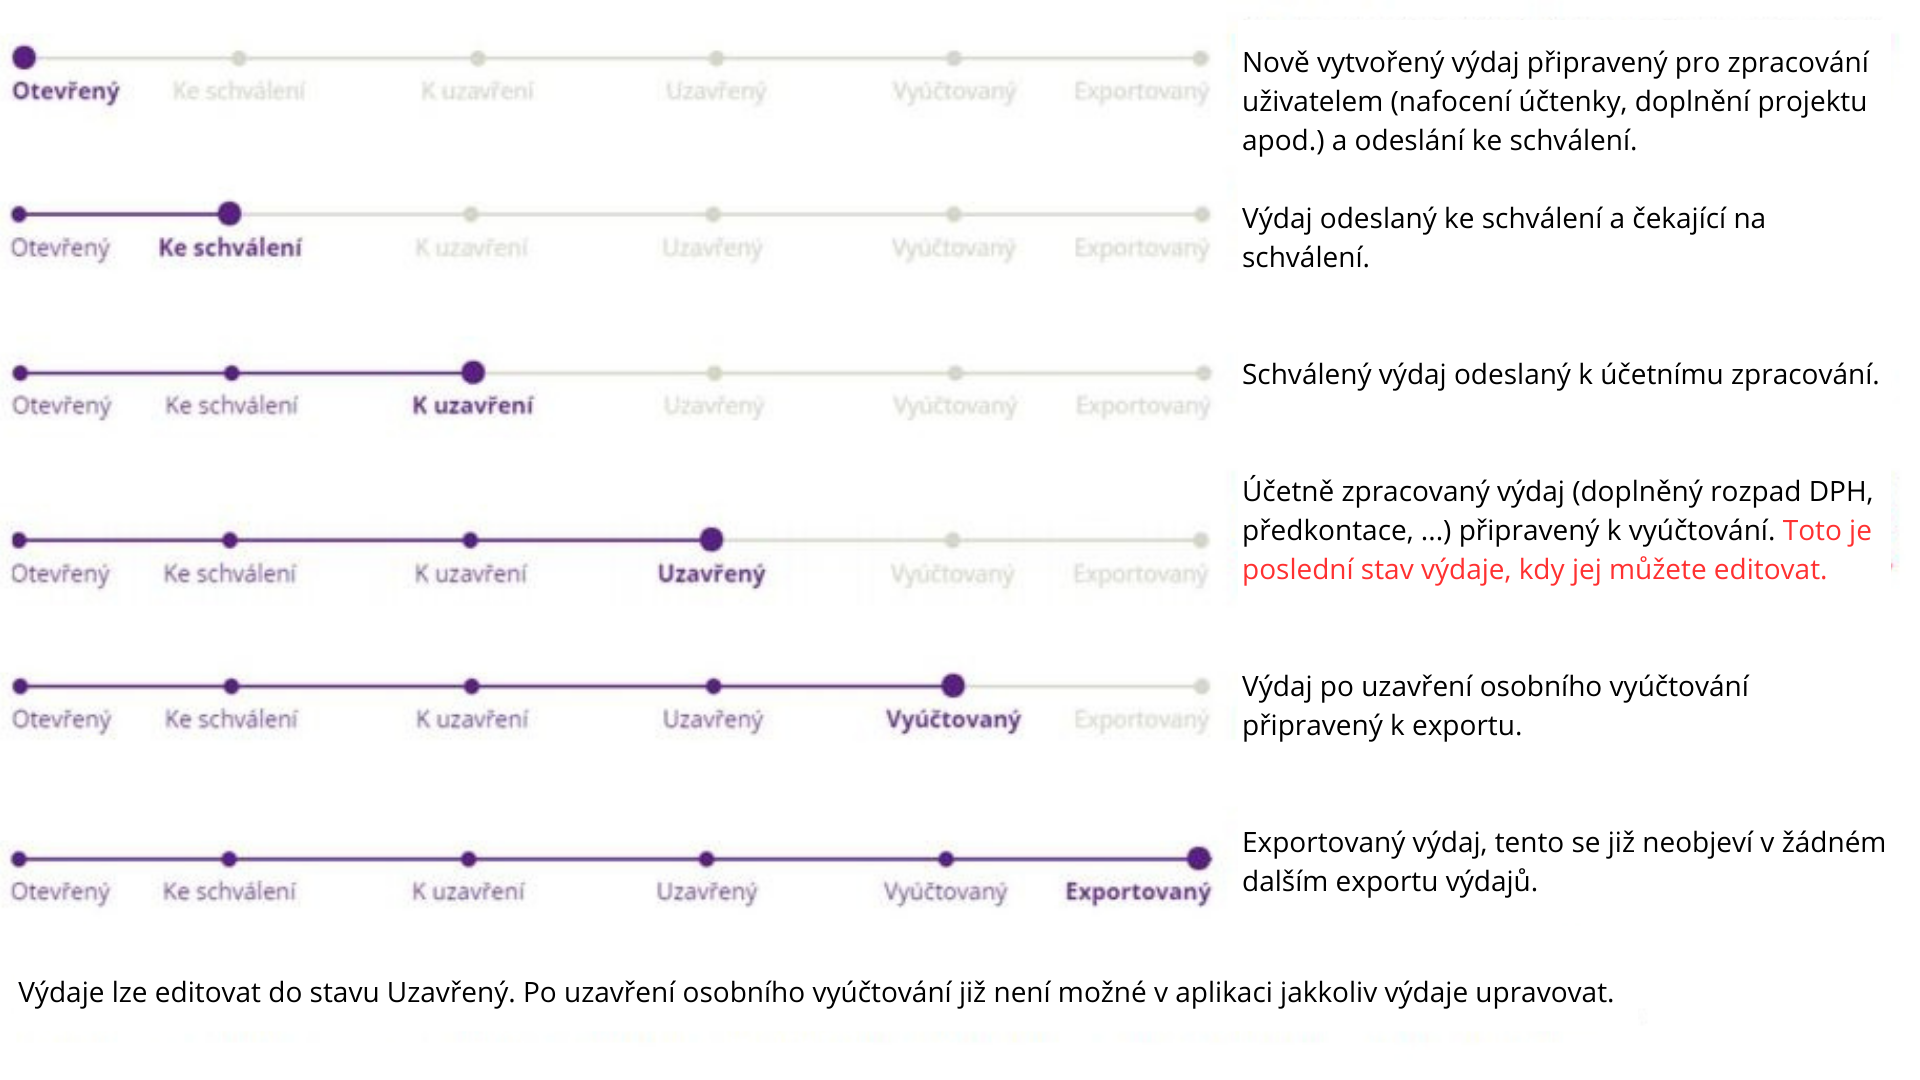
Description of individual expenditure balances: