Search
Close this search box.

User rights and roles

Key roles and their rights

User

  • creates, edits and submits their expenses (card and cash) for approval

Accountant

  • sets up expenses (pre-costing, VAT breakdown, …) and projects
  • can edit and reject expenses and receipts of all users
  • closes all expenses and personal accounts
  • balances cash
  • sets the integration into the accounting system
  • exports to accounting and payroll systems

Cashier

  • charges and discharges the cash wallet of each user

AML Commissioner

  • verifies (identifies) cardholders on the basis of authorisation from Fidoo

Finance Administrator

  • recharges and uncharges Fidoo account
  • sets up direct debits and Fidoo account
  • receives information about the drop in the Fidoo account
  • can order travel insurance

Main Administrator

  • adds, edits and deletes users
  • orders, recharges and discharges, locks and blocks cards
  • sets the approval
  • sets restrictions on cards
  • sets teams
  • sets up receipts (meal and pocket money)
  • sets up vehicles
  • sets the integration into the accounting system
  • manages the API key
  • orders travel insurance
  • can change the company’s mailing address
  • can add users to the Accountant key role

Statutory representative

  • determines the key roles in the application – he is the only one who can add and remove key roles (except for the accountant, the Main Administrator can also assign it).

Packages of rights

View users and cards

  • view list of users and cards
  • export of users

Managing users and cards

  • creation and management of users and cards
  • view list of users and cards
  • export of users
  • user profile settings
  • user rights management
  • managing card actions lock and block
  • approval settings (people, teams and team cards)

Manage card actions to charge and uncharge

  • display of cards
  • charging and discharging the card

Overview of corporate finances

  • overview of corporate finances
  • overview of invoices and charges
  • generation of Fidoo account statements

Overview of company finances without Fidoo account

  • overview of company expenses, cards and their transactions, cash and wallets

Managing corporate finances

  • setting up one-off/regular direct debits
  • Fidoo account debit
  • setting up notifications on your Fidoo account
  • view and manage card transactions
  • adding a note to a transaction
  • generation of statements and reports on cards / card transactions
  • overview of corporate finances
  • overview of invoices and charges
  • generation of Fidoo account statements
  • generating a report of receipts

Travel reports

Setting the meal allowance

The meal allowance rates listed in the application are set according to the Labour Code. However, you can adjust them higher as follows:

  1. Section SettingsCredits MealsCreate new (top right).
  2. Write the name and select the validity, add the new domestic meal allowance rates.

    You can adjust the foreign meal allowance:
    a) Bulk – enter the percentage of the meal allowance and select Recalculate.
    b) Individually – in the search window, type the country for which you want to adjust the meal allowance and change the rate for the selected country.

  3. Save.

Setting your pocket money for a trip abroad

  1. Settings Honours Pocket Money – activate Pocket Money in the system (top right).
  2. Choose to calculate your pocket money before or after the reduction of foreign diets.
  3. Enter the percentage of your pocket money and select Recalculate.
  4. Save.

Mandatory field settings

  1. Section
    Settings – Honourings – Required fields
  2. Use the button button to enable/disable the obligation to add a specific data to the expenditure.

Teams

Team formation

  1. SettingsTeamsAdd Team (top middle) .
  2. Name the team, select its manager and click Add Team.
    Adding a new team in Fidoo
  3. Click on 
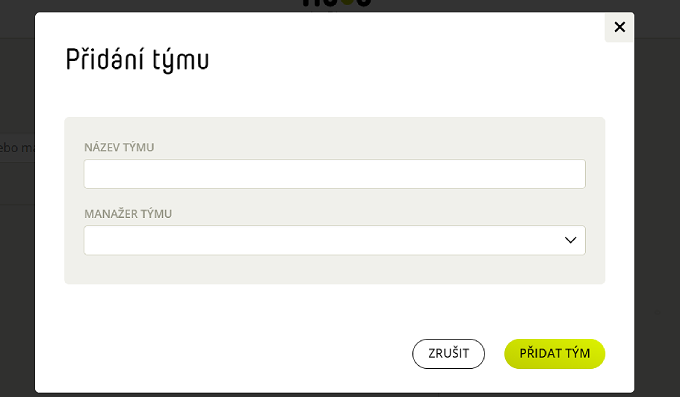
, select Add Team Members and select them from the list of users in the app.
  4. Confirm with the Add Selected button.

Team setup

SettingsTeams – click on the team you want to set up.

  1. Approval tab
    a. Select Individual Approval.
    Setting up teams
    b. Scroll and select each approver and Save Settings.
  2. Settings tab
    a. Select Individual settings for this team.
    b. Scroll to select cost centres and projects and Save.

Projects

Creating a project

  1. Section SettingsProjects.
    Manual settings
  2. Click on Add Project (top middle) .
  3. Fill in the necessary fields and select Save Project.
    Import project list
  4. Click on Import projects.
  5. Download and fill in the prepared sample file.
  6. Click Insert File, find the file on your computer and select Import.

Project approval settings

  1. Section Settings – Projects – click on the project you want to set up.
  2. Select the Approvers tab (right side of the screen).
  3. Check Individual Settings and select Single or Dual Approval.
  4. Select the approver, the approval limit and Save settings.

Modification of the project

  1. Section
    Settings – Projects
  2. Click and select
    deactivate/edit project
    .
  3. After the modification still
    Save
    .

Deleting a project

  1. Section
    Settings – Projects.
  2. Click and select
    Delete project
    .
  3. Confirm with the button
    Delete project
    .

Creating and setting up a user

Create a new user in Fidoo

  1. Settings – People – Add user (top centre).
  2. Fill in all fields and select whether this is a user with/without access to the application.
  3. If you are using dynamic user management, select whether you want the user to be active or deactivated.
  4. Enter Add user.

Bulk import of users

  1. Section
    Settings – People
    .
  2. Click on and select
    Import user
    .
  3. Download and fill in the prepared sample file. Rules for importing users
  4. Click on
    Select File
    , find it on your computer and select
    Import
    .

Login details for users

Each new user will receive an activation email that is valid for 30 days. You can send a new activation email from the app at any time. If the option to forward the activation email does not appear in the app, the user’s account is already active.

  1. Settings – People – click on the person you want to send the email to.
  2. Click on the Send Activation Email link.

Super user - user settings in multiple companies

  1. Settings People Add user (top centre).
  2. Specify the email that the user uses to log in to the application and wait for uniqueness verification.
  3. Confirm with the Add user button.

Approval settings

  1. Section
    Settings – People
    – click on the user you want to set up approval for.
  2. Select the Approval tab (right side of screen) –
    Individual settings
    .
  3. Select the approval option, approver from the list of users, and confirm with the Save Settings button.

Setting up a crowd

  1. Section
    Settings – People
    – click on the user you want to set up the shortcut for.
  2. Select a tab
    Advocate
    (right side of the screen) –
    Add Shortcut
    .
  3. Select a shortcut from the list of users, enter the time of the shortcut, and confirm with the
    Set up
    .

Setting up notifications in a queue

  1. Section Settings – Company – Notifications.
  2. In the section Advance by scroll bar to enable/disable sending notifications to the representative, and Save.

Frequently asked questions to users

Like the approver, the team manager has a visible Team Finance agenda (with the addition of cards and cash) and can see Teams in the settings. However, he cannot edit them.

In Team Finances, the manager can then find an overview of everything his team members have in their My Finances agenda. All their cards, expenses, cash and assignments. This gives him a complete overview of what’s going on in his team.

The user’s phone number can be changed by the Main Application Administrator.

  1. InSettings → People, select the user whose number you want to change.
  2. On the right side of the screen, you will see the user detail and the Profile tab.
  3. Click on the green text Edit profile and a window will open where you can change the phone number.

The phone number is used to log in to the app and also for online payments as a security feature, so-called. 3D secure SMS.

The master administrator can change the user’s rights in the web application.

  1. InSettings → People, select theuser whose rights you want to override.
  2. On the right side of the screen, you will see the user detail and a button with three dots.
  3. When you click this button, a sheet appears, and you click Edit Rights.
  4. In this interface, you can see what rights can be set for the user and what actions the user will be able to perform with the appropriate rights settings.
  5. Select the rights package and save the selection.

To change or edit a user’s name, you need to re-identify the user. Settings – People – via select Identify User. In order to modify the identification, it is necessary to have all the user’s identification data.

A user without the app will not be able to use either the web or mobile app. However, he can use the Fidoo card in a limited mode (online payments cannot be processed).

A deactivated user will not be able to use the web or mobile app and cannot order a payment card. If he has the card, it will be locked and cannot be used during the deactivation period. There is no monthly fee for such a user.

Cards

Ordering a personal card

Play Video
  1. SettingsCardsOrder card (top centre).
  2. Select Personal Card and Order.
  3. Fill in the necessary details, select the delivery address and click on Order Card.

Order a team card

Play Video
  1. SettingsCardsOrder card (top centre).
  2. Select Team Card and Order.
  3. Fill in the necessary details, select the delivery address and click on Order Card.

Card settings

  1. Section SettingsCards – select the card you want to set up.
  2. Click on Settings icon and select Edit Settings.

Recharging the card

  • Manual – the user must send a request to recharge the card.
  • Automatic – the card is automatically recharged to the specified amount when it falls below the specified threshold. Turning the option on/off also sets the limit for a given time period (week or month).
  • Regular – the card will be topped up to a specified amount every week or month.

Allowed card transactions

  • ATM withdrawals – prohibits/allows withdrawals from ATMs in the Czech Republic and abroad.
  • Merchant payments – prohibits/enables merchant payments.
  • Online payments – prohibits/enables online payments.

Restriction of payment card functionality

  • For transport-related payments only – once activated, it limits merchant payments to only those associated with transport (toll gates, petrol stations, parking meters, etc.).
  • Restrict card use to selected days only – once activated, you can tick the days you want the card to be used.

Setting up approvals on the team card

The approval setting on the team card overrides all other settings. This means that when a user swipes a team card, the approval of expenses follows the settings on the card. When ordering, the card is automatically set to approve at the company level.


  1. Settings – Tabs
    – tab
    Approvals.
  2. Choose
    Individual settings.
  3. Fill in the necessary fields and
    Save
    .

Fidoo Cards FAQ

If you wish to cancel the card you have just ordered, you can do so by blocking the card no later than 21:00 on the day you ordered it. This card will not go into production. Contact the Client Care Centre for a refund of the card production fee.

This is an auxiliary identifier that only appears in the application and the expense report. This element will not be embossed on the card and can be changed at any time. This is often the case, for example. employee number or vehicle registration number.

A card manager is a user who can pass a team card to another user in the application. At the same time, they can see in Team Finance → Cards → Transactions all the movements on the managed card and which person made the transaction. It can also charge/discharge, lock or block the card at any time and set its parameters

The card top-up approver approves or rejects top-up requests. The administrator can modify the card (charge/discharge it, change its settings, modify the automatic recharge scheme and limits). The cardholder is the only one who can physically handle the card – pay (even online) or view the PIN.

You cannot set a daily limit on the card within the app, it is determined by the amount loaded on the Fidoo card.

Top-up funds are on the card immediately after top-up (if you have sufficient funds in your Fidoo account). The withdrawal is made immediately back to your Fidoo account.

The card is usually shipped the next business day after ordering/renewal, delivery time is 5 – 7 business days. The card is sent by ordinary letter, the condition for delivery of the card is a properly marked mailbox of the recipient.

Expenditure

Creating a VAT breakdown

  1. Section Settings – Expenses – VAT breakdown.
  2. Click on New VAT breakdown, add the name and abbreviation and Save.

Adjustment of VAT breakdown

  1. Section Settings Expenses VAT breakdown.
  2. Click on and turn off/on the use of segmentation.
  3. Click on Edit button, edit the name or abbreviation and Save.

Deleting the VAT breakdown

  1. Section Settings Expenses VAT breakdown.
  2. Click on and select Delete VAT breakdown.
  3. Confirm with the Delete VAT breakdown button.

Creating a preconfiguration

  1. Section Settings Expenses Pre-accounting.

    Manual settings

  2. Click on
    New preconfiguration.
  3. Fill in the name, code, usage and accounts and
    Save
    .

    Importing a list of preconfigurations

  4. Click on
    Import preconfigurations.
  5. Download and fill in the prepared sample file.
  6. Click on
    Insert file
    , find it on your computer and select
    Import
    .

Modifying pre-contraction

  1. Section Settings Expenses Pre-accounting.
  2. Click on Options switch and turn off/on the use of preconfiguration.
  3. Click on , edit and Save.

Deleting a preconfiguration

  1. Section Settings Expenses Prepayments.
  2. Click on and select Delete Preconfiguration.
  3. Confirm with the Delete preconfirmation button.

Creating a cost centre

  1. Settings Expenses Cost centres.

    Manual settings

  2. Click on New cost centre.
  3. Fill in the name and abbreviation and Save.

    Import list of resorts

  4. Click Import resorts.
  5. Download and fill in the prepared sample file.
  6. Click Insert File, find the file on your computer and select Import.

Cost centre modification

  1. Settings Expenses Cost centres.
  2. Click on Options switch and turn off/on the use of the cost centre.
  3. Click on , edit the name or abbreviation and Save.

Deleting a cost centre

  1. Settings Expenses Cost centres.
  2. Click on and select Delete.
  3. Confirm with the Delete Centre button.

Mandatory field settings

  1. Section Settings Expenses Required fields.
  2. Use the Options switch button to turn off/on the obligation to add a specific expenditure.