- Bottom menu – Approvals – Expenditure tab.
- Click on the expense you want to approve.
- If necessary, select Edit, edit the data and Save.
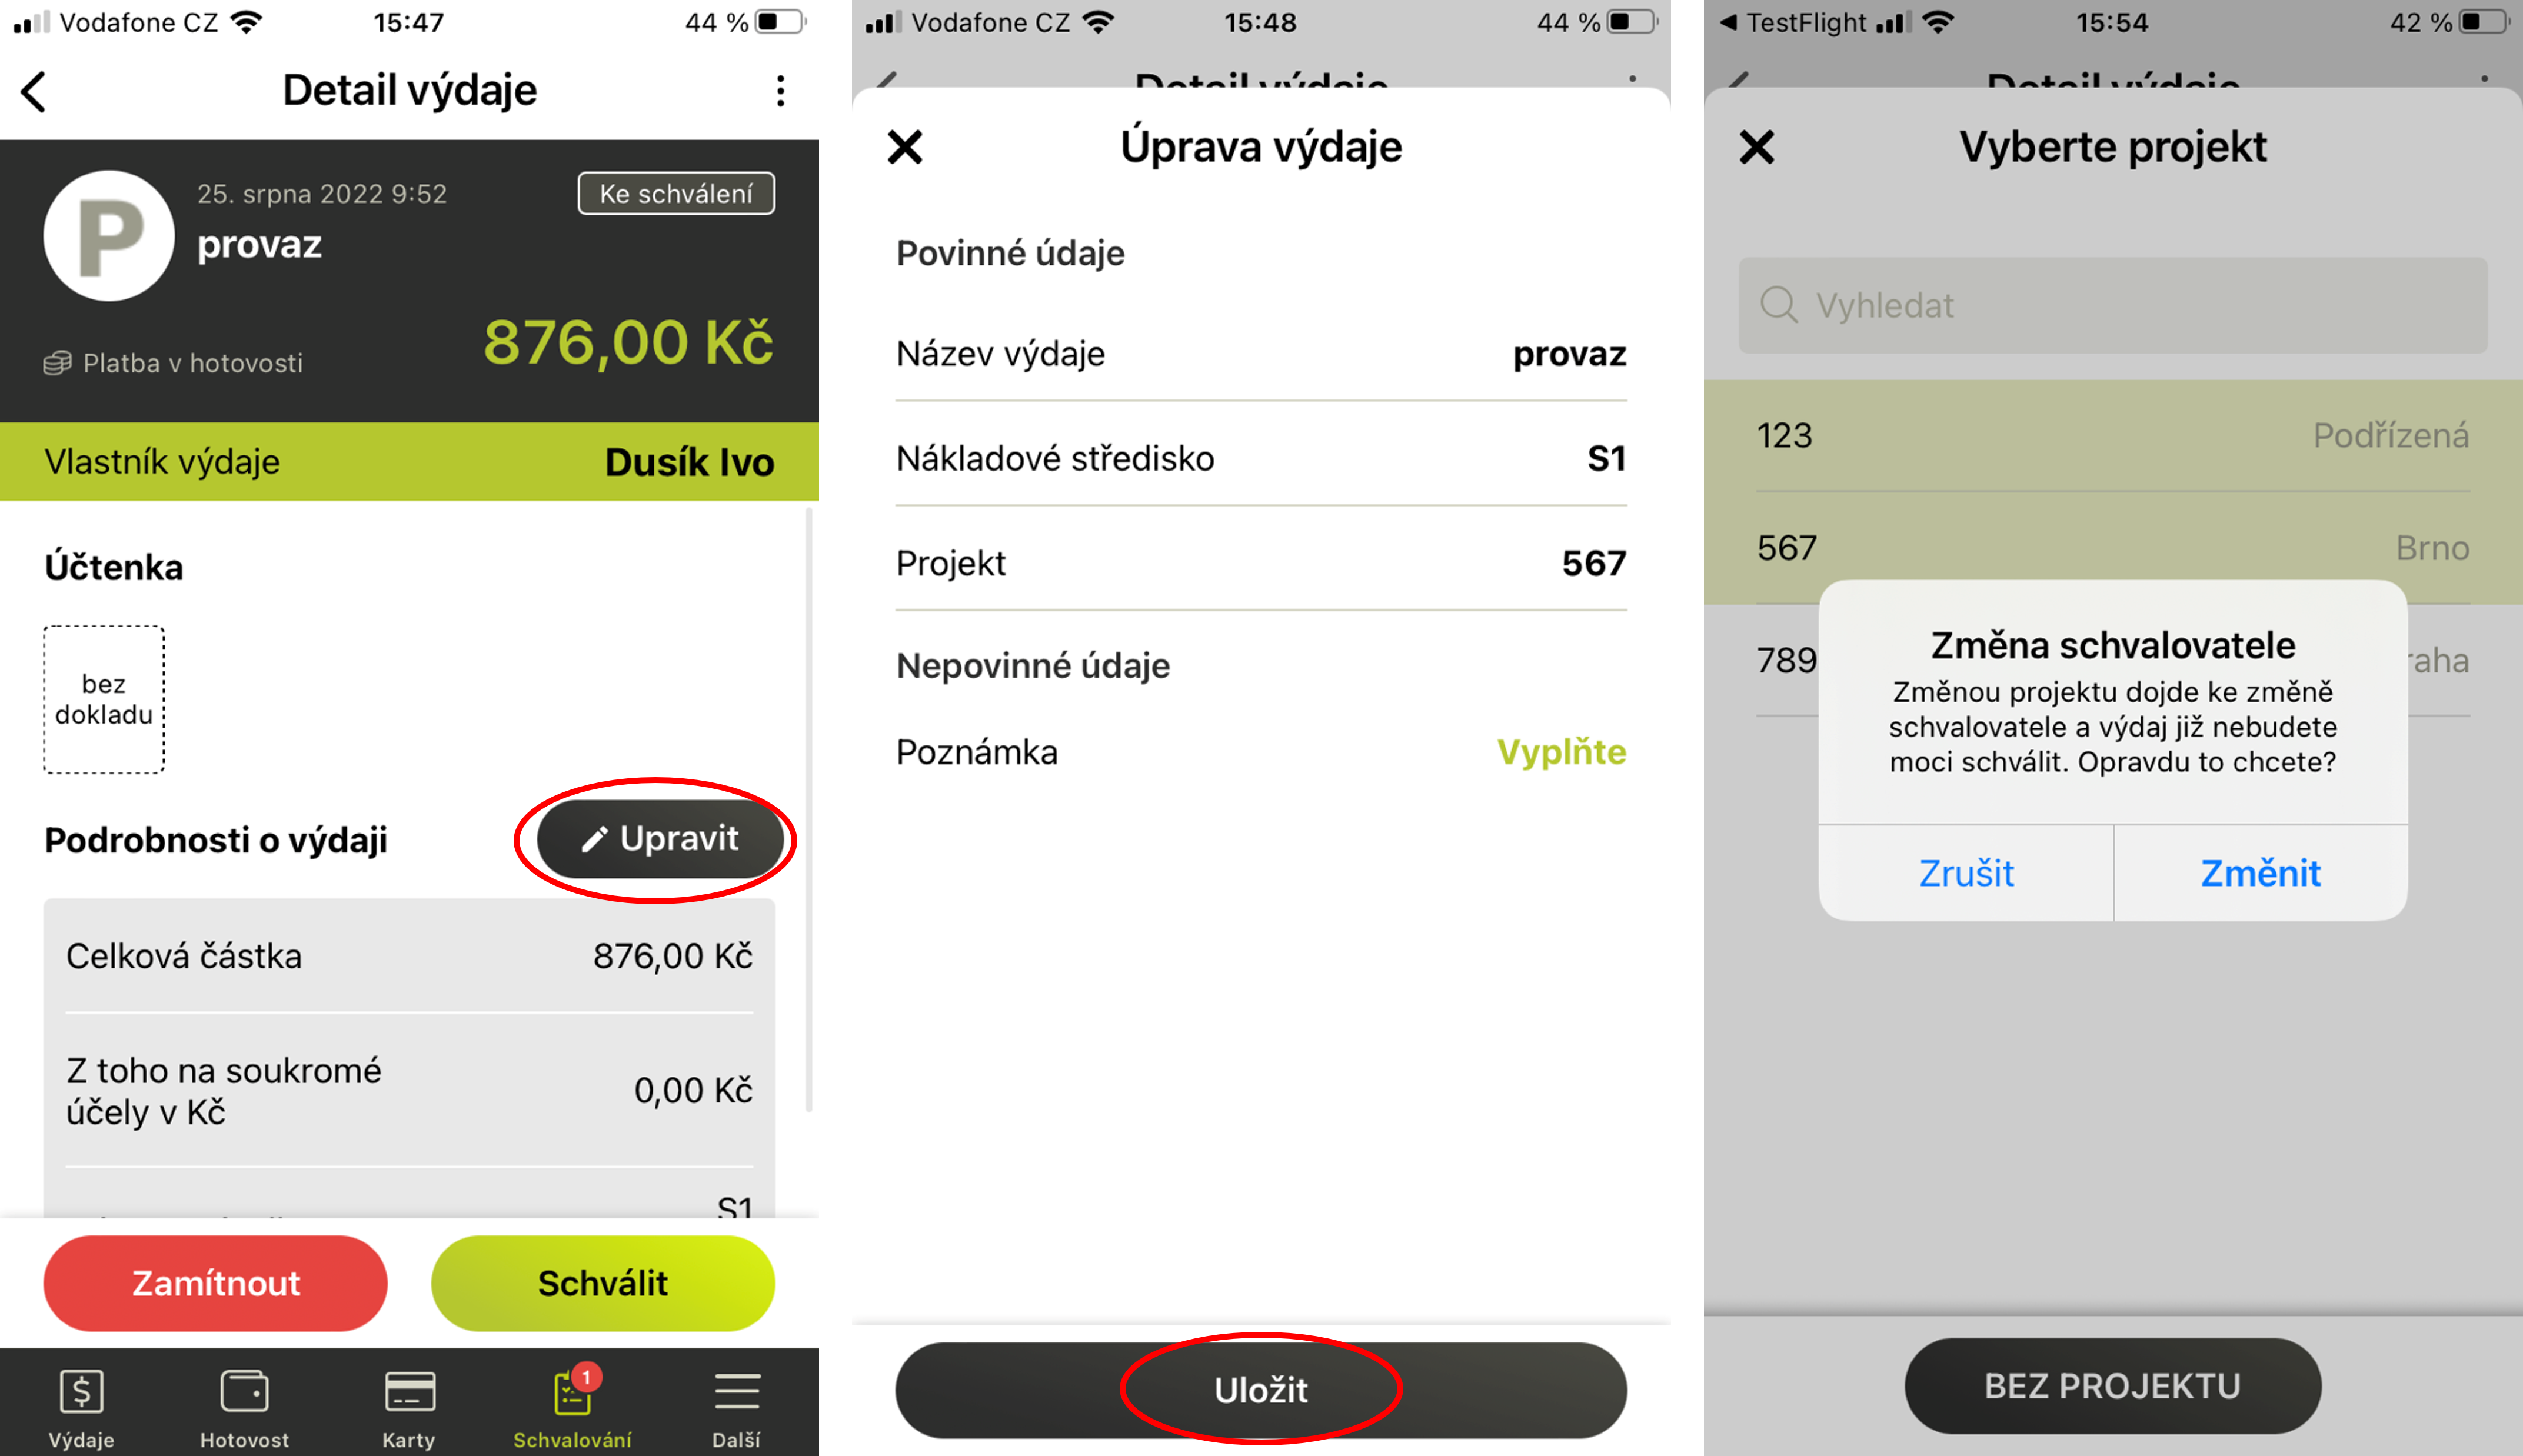
- Select Approve and Confirm.
Approval and rejection of assignments
Approval and rejection of top-up card applications
How approval works in Fidoo
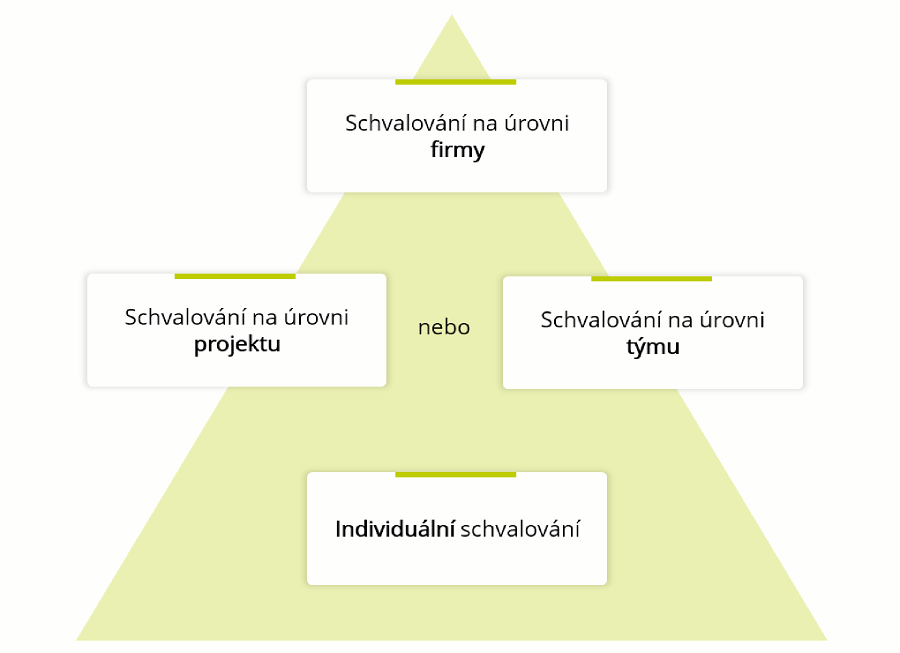
Approval at company level
- This is the most general form of approval, where the same approver is set for all users.
Approval at team level
- The user selected as the team manager sees the team members’ expenses and usually becomes the approver.
Approval at project level
- For each project that is entered in theapplication, , it is specified who is its approver. When a user enters a project into an expense or assignment, the user specifies to whom it will be sent for approval.
Individual approval
- Each user has their own approver set up, but when selecting Project Approval, the individual settings cannot be applied to approve expenses and receipts.