Search
Close this search box.

View transactions

Filter and download card transactions

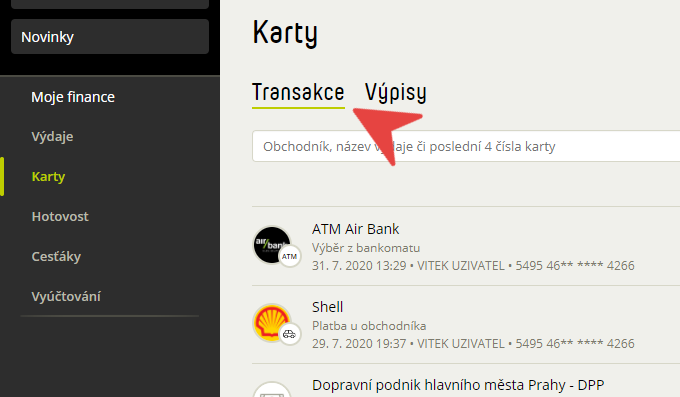
  1. My Finances – Cards – here you can see all the card transactions you have created.
    Transactions in Fidoo
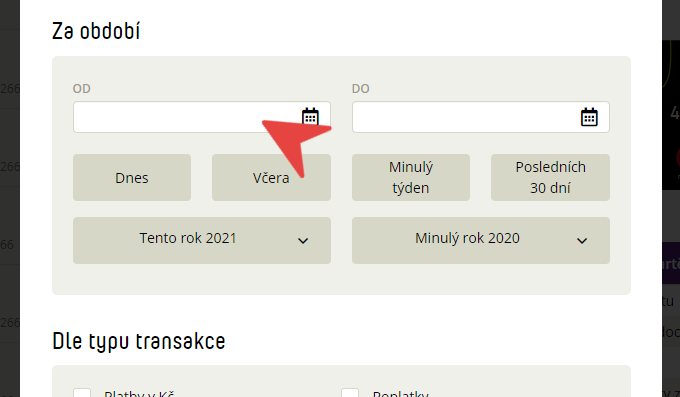
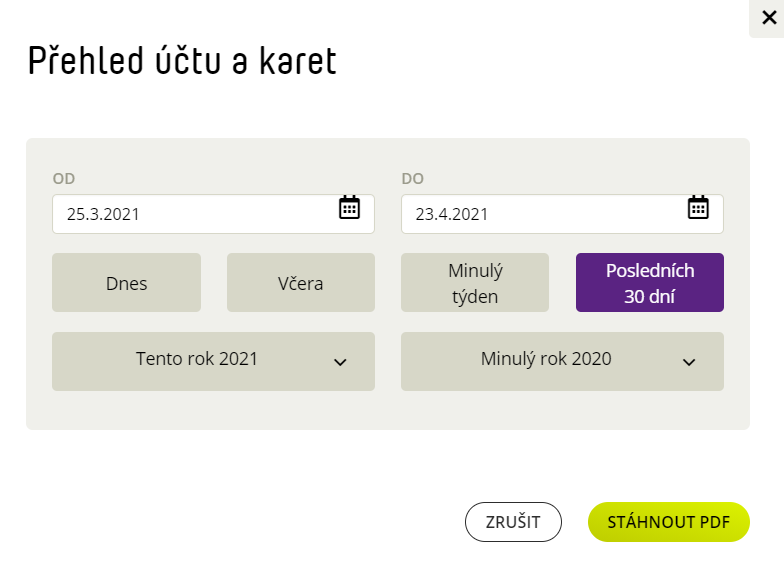
  2. Click Set filter, set the filtering parameters, and then type Confirm filter.
    Filtering transactions
  3. Click on Download icon to download a filtered transaction report.

View transactions on the card

Play Video

Transaction statuses

Blocked Transaction – the payment has been made but not yet accepted by the merchant, the blockage may last for several days.

Rejected transaction – the payment was not made for some reason (insufficient funds, wrong PIN, expired card, etc.)

Transaction FAQs

  • Check the validity of your card.
  • Make sure you enter the correct details (PIN, card number, expiry date, CVC/CVV code).
  • Make sure you have enough funds on your card.
  • Check that you are allowed the payment method you are trying to pay with.
  • If you have checked all of the above, please contact the customer service line.
  1. My Finance – Cards – Statements – here you can find all monthly statements for your card.
  2. Click on the listing and the details will be displayed on the right side of the screen.
  3. You can download the extract using the Download to pdf button .
  4. In the case of external cards, you can find the statement directly on the bank’s website.

Payment by card

Paying at the merchant's terminal

  • When paying up to CZK 500, just attach the card to the terminal.
  • For payments of more than CZK 500, hold your card to the terminal and enter your PIN.

Paying on the internet

Web app

  1. After selecting the payment method, you will be redirected to the payment gateway.
  2. Enter the full card number, expiry date, CVV/CVC code and confirm.


    Fidoo card

  3. Log in to Fidoo, where a payment confirmation window will appear.
  4. Click on Approve Payment.
  5. Enter the password to log in to the app and the SMS code that will be sent to your phone and Confirm.
  6. Close the payment confirmation window and return to the merchant’s website.


    External card
    The third step is to confirm the payment on your bank’s website according to their instructions.

Mobile app

  1. After selecting a payment method, you will be redirected to the payment gateway.
  2. Enter the full card number, expiry date, CVV/CVC code and confirm.
  3. Click on the notification you received on your phone.
  4. Click on Approve Payment.
  5. Confirm with a fingerprint, facial scan or PIN to log in to the app.
  6. Close the payment confirmation window and return to the merchant’s website.

ATM withdrawal

  1. Insert your card into the ATM and enter your PIN.
  2. Select Cash Withdrawal, enter or select the amount, confirm and proceed as instructed at the ATM.

MO/TO payments

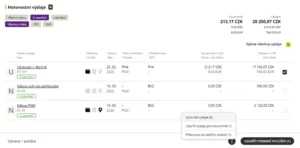
What are MO/TO payments and what are they used for?

MO-TO payments is the term for transactions that take place “remotely” (i.e. over the phone or email).
They are used, for example. when booking a hotel, renting a car or ordering goods or services over the phone.
In practice, the payment is made by the cardholder providing sensitive card details to the other person without further
security (card number, expiry date and CVC/CVV code) and this payment can then be successfully
implemented.

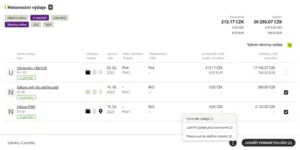
Currently, MO/TO transactions are already minimally used, as they have been replaced by payment gateways. If
the cardholder encounters this type of transaction, we recommend caution and verification
the trader to whom the data is transmitted.


MO/TO transactions and Fidoo cards

Fidoo cards also support MO/TO transactions while maintaining an appropriate level of security. Already at the moment
activation of the Fidoo card, this payment method is automatically enabled.
However, the way in which the MO/TO enters the payment is often crucial to the success of the payment
processing directly by the merchant where the cardholder makes the payment. To eliminate potential problems
we recommend using payment terminals or payment gateways.
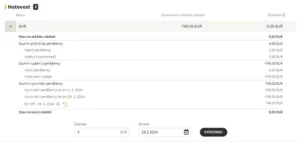
Frequently asked questions about paying by card

This is the three numbers listed on the back of the card by the signature strip. It is a code that is used to identify the card when paying online.

Confirmation via push notification is only available in the current version of the Fidoo mobile app for both iOS and Android. We recommend downloading the latest version.

The second reason may be that the merchant (the e-shop) does not require this method of verification.

With the Fidoo card, you can only top up Google Ads by topping up a specific amount in one go, as follows:

  1. In Google Ads, click on Settings & BillingBillingOverview at the top right.
  2. Click on the Make Payment button.
  3. In the window that opens, click Add Credit or Debit Card.
  4. Enter your Fidoo card details and the amount you want to top up.

    After checking your details and confirming, the top-up amount is immediately loaded into your Google account and the transaction is immediately displayed in the Fidoo app.

If you pay by card frequently or for smaller amounts, the merchant’s terminal may not connect to the bank to verify the current balance and charge the payment later. Why is this happening? Every online payment costs something, so some merchants accept small amounts. offline. It also helps them check in faster at the checkout. Thus, the card is not blocked, as is usual, and the merchant simply deducts the payment from the card in a few days, which can put the card in the negative.

It’s good to know that you won’t see the payment in the app if it’s offline. You will only see the payment when the merchant posts it.

Fidoo billing and fees

Fidoo account balance

  1. Corporate Finance Fidoo Account section – click on Fidoo Account and Card Overview.
  2. Enter the date and click on Download PDF.

Account and card overview

Frequently asked questions

Invoices can be found in the Corporate FinanceInvoices and Fees section, where you can download the invoice for the month in PDF format.

Fee statements in the Corporate FinanceInvoices and Fees section, where you can download the statement for the month in PDF format.

The invoiced amount is automatically debited from the Fidoo account at the beginning of the month following the month of invoicing. If your Fidoo account is not sufficient, you will be asked to top up your account by email.

If you have set up the generation of statements (link), you can find them in the Corporate FinanceFidoo Account section under the Statements tab.

Accounting approval

Filtering over people and items

The app allows you to filter the data using the Set Filter button, which you can always find in the middle of the screen at the top in the following sections:

User filter: section SettingsPeople
Expenditure filter: section Corporate FinanceExpenditure
Card filter: section Corporate FinanceCards – tab Information about the cards
Card Transaction Filter: section Corporate FinanceCards – tab Transactions
Filter wallet currencies and view cash balance to date: section Corporate financeCash – tab Wallets
Cash transaction filter: section Corporate financeCash – tab Transactions
Filter travel requests: section Corporate FinanceTreasures – bookmark Applications
Filter messages for business trips: Corporate FinanceTreasures – bookmark News
Fidoo account transaction filter: section Corporate finance – tab Transactions
Vehicle filter: section SettingsVehicles and display of cash on hand

Editing and approval of items

Expenditure

  1. Corporate Finance Expenses – click on the expense you want to edit/approve and select Edit.
  2. Complete/edit the necessary fields and select Save or Close Expense (depending on the current status of the expense).

Travel reports

  1. Corporate Finance Honours Reports tab – select the report you want to edit/approve.
  2. Click Edit message (top right).
  3. Fill in/edit the necessary fields and select Save or Close message (depending on the current status of the message to the receipt).

Personal settlement

Closing an item as private

  1. Section Accounting agenda Personal accounts – select the user.
  2. Check the expenses that are to be private (box to the right of the expense).
  3. Click on Settings icon (bottom right) and select Close Expenses as Private.
  4. Confirm by clicking Close as private.

Carry forward to the next accounting period

  1. Section Accounting agenda Personal accounts – select the user.
  2. Tick the items you want to move (box to the right of the expense).
  3. Click on Settings icon (bottom right) and select Move to next period.

Reversal of an item carried forward to the next accounting period

  1. Section Accounting agenda Personal accounts – select the user.
  2. Scroll all the way down or click the Moved to next period tab.
  3. Select View and click to return the expense to the current accounting period.

Enforced closure of expenses and assignments

  1. Section Accounting agenda Personal accounts – select the user.
  2. Tick the items you want to close and select Close selected items (bottom right).
  3. Confirm with the Close button , including the unapproved ones.

Reopening a closed item

  1. Section Accounting agenda Personal accounts – select the user.
  2. Find the item you want to reopen and click .

Cash settlement

  1. Section Accounting agenda Personal accounts – select the user.
  2. Scroll down or click on the Cash tab.
  3. Enter the date and select Align All.

or click on , enter the amount and date and select Settle.

Cash settlement

If the Accountant uses cash reconciliation for the employee and his/her wallet, then this wallet is reset on the employee’s side in Fidoo (this reconciliation is visible in the cash wallet as an entry, as well as in the employee’s Personal Statement). At the same time, this settlement will be reflected in the Export for Wages.

Settlement of cash expenditure

  1. Section Accounting agenda Personal accounts – select the user.
  2. Scroll down or click on the Cash expenditures tab.
  3. Tick the expenses to be offset (box to the right of the expense).
  4. Click on :trojrypák: (bottom right) and select Balance expenses.
  5. Confirm with the Align button.

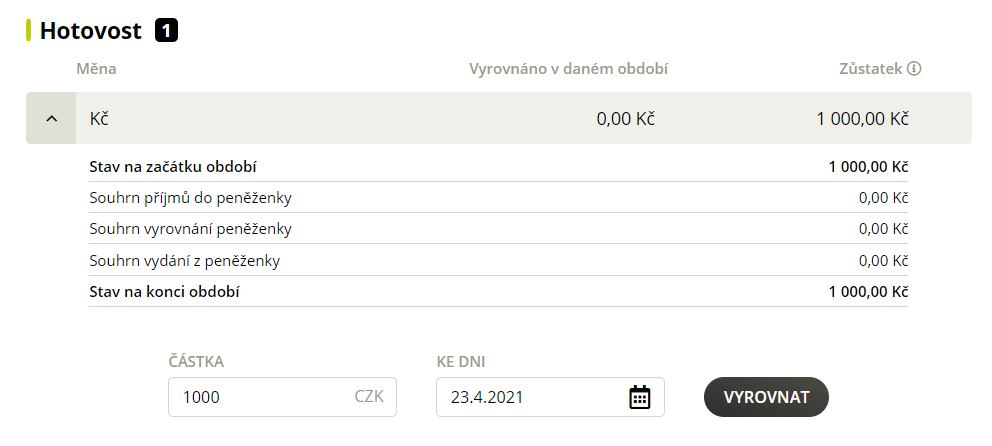
The balanced expenditure can be found in the Wallet Settlement Summary. Here you also have the option to undo the expense settlement by clicking on :sipka_zpet_zelena:. It is possible to return the expenses individually – each balanced expense is listed here on a separate line.

Click on Reconcile to reconcile the expenditure in the amount on the date specified.

Conclusion of personal settlement

  1. Section Accounting agenda Personal accounts – select the user.
  2. Check that all items are in the Closed state.
  3. Select Close entire settlement (top right) and confirm with the Close settlement button.

Closure of the entire settlement

Closure of personal accounts without approved items

  1. Section Accounting agenda Personal accounts – select the user.
  2. Check that all items are in the state you want.
  3. Select Close entire settlement (top right).
    The application will notify you how many pending items will be automatically carried forward to the next accounting period.
  4. Select Close billing.

Bulk closing of personal accounts without items

  1. Section
    Accounting agenda – Personal accounts
  2. Click on Set filter, check Open and Without items and select Filter.
  3. Tick the first Personal Billing and then press and hold Shift to tick the last billing (the billing will be marked in bulk).
  4. Choose Close blank bills.

Export of personal accounts

  1. Section Accounting agenda Personal accounts – select the Personal accounts you want to export.
  2. Click on Settings icon (top right) and select Download PDF.

Exporting bills to PDF

Export receipts for personal billing

  1. Section Accounting agenda Personal accounts – select the Personal accounts you want to export.
  2. Click on Settings icon (top right) and select Export receipts.

Description of individual expenditure balances:

Company settings

Fidoo account settings

  1. Section SettingsCompanyFidoo account.
  2. In the Generate automatic statements box, click Change settings.
    Generating statements
  3. Click on
    Options switch
    to turn on the settings option.
  4. Select the format, frequency and method of sending and Confirm.

Setting up invoice sending

  1. Section
    Settings – Company – Billing
  2. Click to activate/deactivate sending invoices by e-mail
  3. Select who will receive the invoice by email by ticking the key role, selecting a user or entering an address and Save your changes.

Setting up personal billing

  1. Section Settings – Company – Personal billing.
  2. Select the frequency of personal billing and Save.

Setting up personal billing

Statements will be sent to you according to the method you have chosen and will also be saved in the application in the Corporate FinanceFidoo AccountStatements tab.

Setting up cession keys

Setting the meal allowance

The meal allowance rates listed in the application are set according to the Labour Code. However, you can adjust them higher as follows:

  1. Section SettingsCredits MealsCreate new (top right).
    Meal allowance rates
  2. Write the name and select the validity, add the new domestic meal allowance rates.

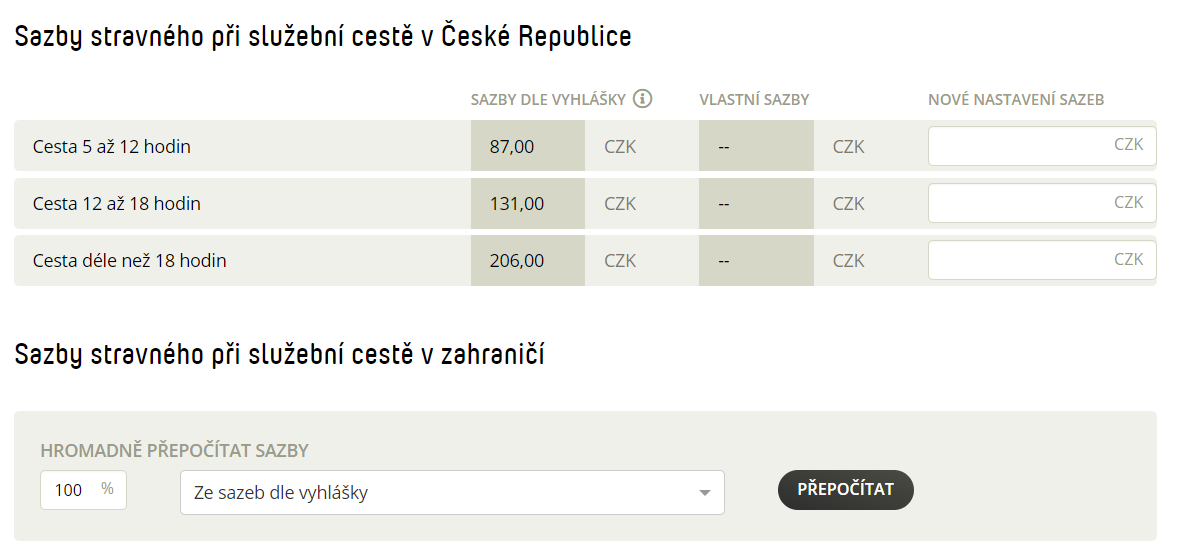
    You can adjust the foreign meal allowance:
    a) Bulk – enter the percentage of the meal allowance and select Recalculate.
    b) Individually – in the search window, type the country for which you want to adjust the meal allowance and change the rate for the selected country.
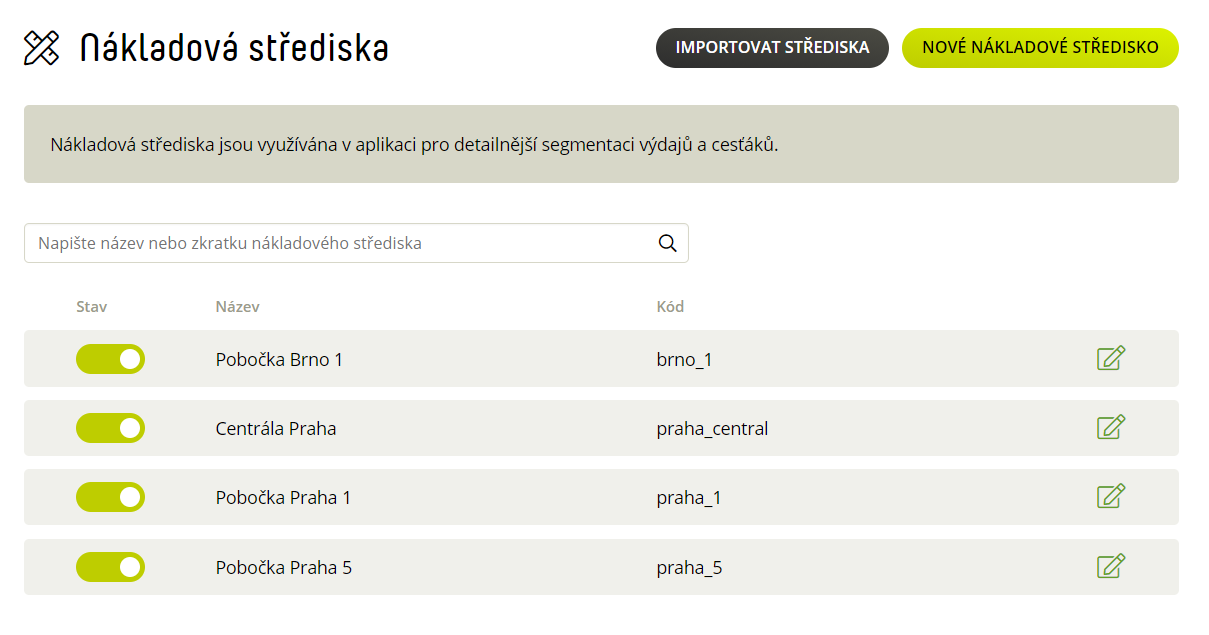
  3. Save.

Setting your pocket money for a trip abroad

  1. Settings Honours Pocket Money – activate Pocket Money in the system (top right).
  2. Choose to calculate your pocket money before or after the reduction of foreign diets.
  3. Enter the percentage of your pocket money and select Recalculate.
  4. Save.

Expenditure settings

Creating a VAT breakdown

  1. Section Settings – Expenses – VAT breakdown.
  2. Click on New VAT breakdown, add the name and abbreviation and Save.

Breakdown of VAT

Adjustment of VAT breakdown

  1. Section Settings Expenses VAT breakdown.
  2. Click on Options switch and turn the use of segmentation off/on.
  3. Click on , edit the name or abbreviation, and Save.

Deleting the VAT breakdown

  1. Section Settings Expenses VAT breakdown.
  2. Click on and select Delete VAT breakdown.
  3. Confirm with the Delete VAT breakdown button.

Creating a preconfiguration

  1. Section Settings – Expenses – Pre-accounting.

    Manual settings

  2. Click on New preconfiguration.
  3. Fill in the name, code, usage and accounts and Save.

    Importing a list of preconfigurations

  4. Click on
    Import preconfigurations.
  5. Download and fill in the prepared sample file.
  6. Click on Select File, find it on your computer and select Import.

Modifying pre-contraction

  1. Section Settings Expenses Pre-accounting.
  2. Click on Options switch and turn the use of pre-contraction off/on.
  3. Click on , edit and Save.

Export of preconfiguration

  1. Settings section –
    Expenses – Pre-booking
  2. Click , select the file format and type
    Export
    .

Deleting a preconfiguration

  1. Section Settings Expenses Pre-accounting.
  2. Click on and select Delete Preconfiguration.
  3. Confirm with the Delete preconfirmation button.

Creating a cost centre

  1. Settings Expenses Cost centres.
    Freight centres

    Manual settings:

  2. Click on New cost centre.
  3. Fill in the name and abbreviation and Save.

    Import list of resorts:

  4. Click Import resorts.
  5. Download and fill in the prepared sample file.
  6. Click Choose File, find the file on your computer and select Import.

Cost centre modification

  1. Settings Expenses Cost centres.
  2. Click on Options switch and turn the use of the cost centre off/on.
  3. Click on , edit the name or abbreviation, and Save.

Deleting a cost centre

  1. Settings Expenses Cost centres.
  2. Click on and select Delete.
  3. Confirm with the Delete Centre button.

Cost centre export

  1. Section
    Settings – Expenses – Cost centres
  2. Click on , select the file format and type
    Export
    .

Creating an accounting category

  1. Section
    Settings – Expenses – Accounting categories


    Manual settings

  2. Click on
    New accounting category.
  3. Fill in the name, code and, if necessary, attach a prefix and
    Save
    .

    Import a list of accounting categories

  4. Click on
    Import categories
    .
  5. Download and fill in the prepared sample file.
  6. Click on
    Select File
    , find it on your computer and select
    Import
    .

Adjustment of accounting category

  1. Section
    Settings – Expenses – Accounting categories
  2. Click and turn off/on the use of categories.
  3. Click , edit everything you need and
    Save.

Export accounting category

  1. Section
    Settings – Expenses – Accounting categories

  2. Click

    , select the file format and type


    Export


    .

Deleting an accounting category

  1. Section
    Settings – Expenses – Accounting categories
  2. Click on and select
    Delete
    .
  3. Confirm with the button
    Delete category.

Mandatory field settings

  1. Section Settings Expenses Required fields.
  2. Using the button Options switch button to turn off/on the obligation to fill in a specific expenditure.

Required fields

Frequently asked questions about setting expenses

In addition to studying the relevant legislation, we recommend that you consider covering the following areas in your processes and directives when implementing the digitisation of accounting documents and their archiving. All information can be found in this article.

It will appear in the cash wallet of the current team card holder. When the team card is handed over to another employee, the cash wallet is not transferred – the amount remains with the person who made the ATM withdrawal.

  • If is accented names do not appear correctly after importing, it means the file is formatted incorrectly. Sgo to to a new sample withoubor and use the Ctrl + C and Ctrl + V to copy the columns into a new file and do the import again. If problems persist, send the import file to

    info@fidoo.com


    for inspection.

Integration to accounting software

Preparing for integration

  1. Find out which accounting system you will be transferring the data to.
  2. Check out our website(Exports and Integration) to see what data transfer options we offer for your accounting system.
    Detailed instructions for each accounting system can also be found below in the Supported Systems section or in the Accounting Instructions ( Exports and Integration section).
  3. If you do not know how to set it up, please contact the customer service line (+420 290 290 290).

Supported systems

Money S3

  1. Section Settings – Integration.
  2. Click on

    , fill in the cashier and account name and Save.

Connecting via API

The Fidoo public API provides comprehensive information about the data that is contained in the Fidoo cloud application and can be distributed and exchanged with any system thanks to this API. The current version of the Fidoo API is located athttps://api.fidoo.com/v2/and includes:

  • Monitoring of card transactions
  • Application user reports
  • Overview of Fidoo cards
  • Orientation in parameters and balances on Fidoo cards
  • Creating a new user and ordering a personal Fidoo card
  • Load and unload personal and team cards

To access the data via the public API, you need to obtain an API key. This can be generated by the master administrator in the Fidoo application.

Travel guide

Creating a logbook export

  1. Section Accounting agenda – Journey book
  2. Use the arrows above the list of vehicles to select the month, you can specify the export request by setting the filter.
  3. Download using the button

    , select the format and then click Export.