Search
Close this search box.

Managing changes in approval

Adjustment of approval at company level

  1. Section Settings Company Approval.
  2. Select the approval method, levels, and select an approver from the list of application users.
    Change of approval on the company
  3. Confirm with the Save settings button.
    If you want to set up consistent approvals for all users, teams, and projects at the company level, proceed as follows:
  4. Click Override all individual settings.
  5. Confirm with the Override all settings button.

Modifying team-level approvals

  1. Settings Teams – select the team you want to edit.
  2. Approval tab.

  1. Edit levels and approvers and Save settings.
    If a team member has individual user-level approvals set up, you need to override all of these settings to team-level approvals. After saving the settings, continue:
  2. Click the Override all individual settings box and confirm with the Override settings button.

Modification of project level approval

  1. Section Settings Projects – select the project you want to edit.
  2. Approvers tab.

  1. Edit levels and approvers and Save settings.

Approval Management FAQs

Setting approvers at the company level is used if you do not have an approver set on the project and/or if you have set “approvals are governed by company level settings” on the project.

Follow the instructions below to set up individual user approval.

  1. In Settings → People , click on the user for whom you want to set up approval.
  2. After selecting a user, the user detail with the Approvals tab appears on the right side of the screen.
  3. In this tab, you select the Individual Settings option and override it according to your requirements.
  4. Since the settings of the cards are based on the settings on the users, this change is immediately written into the personal card settings of the users.

Approval and rejection of top-up card applications

Approval of a top-up card application

Web app

  1. Approvals section tab Recharge Cards click on the card you want to approve.
  2. Select Approve (bottom right).


Mobile app

  1. Bottom menu Approvals tab Recharge Click on the tab you wish to approve.
  2. Select Approve and Close.

Rejection of a top-up request

Web app

  1. Approvals section tab Recharge Cards click on the card you want to reject.
  2. Select Reject (bottom right).
  3. Give a reason and Confirm.


Mobile app

  1. Approvals section tab Recharge Click on the tab you want to reject.
  2. Select Reject.
  3. Give a reason and select Reject.

Travel insurance

Ordering travel insurance

  1. Section Settings People – select the user for whom you want to arrange travel insurance.
  2. Click on Ikona nastavení and select Order Insurance.

  1. Select the type of insurance by clicking the Order Standard Insurance or Order Plus Insurance button.
  2. Confirm with the Order insurance button.

Cancellation of travel insurance

  1. Settings People – select the user you want to cancel travel insurance for.
  2. Click on Ikona nastavení and select Terminate Insurance.
  3. Confirm with the Cancel Insurance button.

Download travel insurance documents

  1. Settings People Products tab.
  2. Click here to download the necessary documents.

Export expenditure

Creating an export of expenses

  1. Section Accounting agenda Export of expenses.
  2. Select Set up filter (right), enter the necessary data and confirm by clicking Filter expenses.
  3. Click Export (bottom right), fill in the name and select Create Export.

Withdrawal of export expenditure

  1. Section Accounting agenda Export of expenses.
  2. Click on the export you want to download and type Download data.

Deleting the export of expenses

  1. Section Accounting agenda Export of expenses.
  2. Click on the export you want to delete, type Delete and confirm with the Delete button.

FAQs on exporting expenses

  1. In My/Corporate Finance → Expenses.
  2. Click the Export Expenses arrow button and select With receipts.
  3. A zip file containing the receipts in the format in which they were added to the application is downloaded to your computer.

Keep in mind that the filter settings will affect what data (and receipts) will be downloaded.

Two-factor login to the application

What is two-factor login

Two-factor login helps you increase the security of access to the Fidoo app and prevents abuse.

This means that the user must pass through two security factors to log into the application.

  • The first factor is your password, which you set when you first log in. You can change your password in the app.
  • The second factor is either a one-time SMS with an authentication code sent each time you log into the Fidoo app or logging in from a trusted device. When you add a trusted device, a one-time authentication via SMS code is performed, after which the code is no longer required. However, if you log in to the Fidoo app from another device, you will again be prompted to authenticate via SMS code.

This whole login security system is called Strong Customer Authentication (SCA) and we are required by law to strongly authenticate every user when they enter the Fidoo application.

What strong authentication login looks like

Frequently asked questions about two-factor login

Yes, you will. Two-factor authentication for login requires only the receipt of an SMS message, which any mobile phone can handle.

If you do not want to fill in a verification code in addition to your login name and password every time you log in to Fidoo, you can enable the Login without SMS verification feature in the app for 90 days.

  1. After entering the login details and confirming with the Login button, a new window will appear for entering the six-digit verification code (shown below).
  2. A code has been sent to your mobile device, which you enter in the fill-in box.
  3. Below the fill-in box, you will see the option to Login without SMS verification for 90 days on this device.
  4. Click on it – instead of the grey box saying No, you now see a green box saying Yes. Confirm the action with the Confirm button and the app won’t prompt you for an SMS code for the next 90 days.

You can find out what strong authentication is for and how to set it up on this page.

Feel free to enter your private phone number. It will only be used to receive SMS authorisation codes and we at Fidoo will not use it to send you any commercial or marketing messages unless you have given us your consent to do so. Your phone number is information that only you and your company’s Fidoo Application Lead Administrator have access to.

You can’t do it without a cell phone. If you haven’t needed to log into the Fidoo app or pay online yet, then nothing has really changed for you.

We recommend entering your private mobile phone number.

In principle, there are no technical limitations; the device can be, for example, a desktop computer, a laptop, but also a tablet or a mobile phone with internet access.

Cookies are one element of identification of such a device. Therefore, after deleting them, you need to mark the device as trusted again.

Yes, a single device can designate any number of different users as trusted under its user accounts.

If you are logging into Online Banking from a device (computer, tablet, laptop, mobile phone, etc.) that is not added to your trusted devices, we will offer you the option to add it to your trusted devices directly on the login screen. You can then just confirm this by SMS. The next time you log in from this device, all you have to do is enter your internet banking ID and password.

Contact the Main Application Administrator and check the accuracy of your phone contact.

We will consider the device you designate as secure (trusted) and for 90 days you can log in with your username and password without having to enter the SMS verification code sent to your mobile phone. After 90 days, you must re-designate the device as trusted and confirm this choice with an SMS verification code.

Identification before conclusion of the contract

What is identification?

Identification is the process by which we verify and record your identifying information for the purpose of entering into the Framework Agreement.

Why is identification necessary?

The obligation to identify our clients is imposed on us by Act No. 253/2008 Coll. (AML Law).

Who do we need to identify?

Identification must be made with each representative of the company who will sign the Framework Agreement, in the case of signature by a statutory representative or by proxy

What happens if we don’t make the identification?

Without identification, it is not possible to enter into a Framework Agreement with us and use the Fidoo services.

What is an identification payment?

This is one of the elements of remote identification that verifies the existence of a bank account.

Where do I find the details to send the identification payment?

This information will be provided to you during the booking process.


Methods of client identification

1. In person

  • Identification will be made by Direct Fidoo at the conclusion of the Framework Agreement

What documents do you need for identification?

  • completed Contract Documentation Form
  • one identity card
  • Verification of ownership of the company account (e.g. bank statement with transaction details blacked out)

What is the procedure?

  • Arrange a personal meeting with our salesman
  • During the meeting, the trader will make an identification and enter the identification data into the internal system

What do we check?

  • According to the company’s ID number, we will find and record basic identification data of the legal entity such as: name, registered office and other information from a valid extract from the Commercial Register
  • Identification of the natural person who acts on behalf of the legal entity when concluding the contract: name, surname, birth number, date and place of birth, permanent residence and nationality of the representatives authorised to act for the company
  • We verify that the client’s appearance matches the image on the identity card
  • We will verify and record the ID card number, when the ID card was issued and by whom (by which authority or state), and until when the ID card is valid
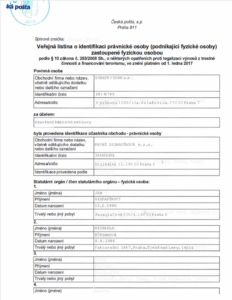
2. Mediated by

Identification is done through the so-called. A public document of identification, which you can send to us or give the original to our sales representative after it has been issued by an official. There is a fee for this service.

What do you need to take with you when you want to apply for a mediated identification?

  • identity card
  • extract from the Commercial Register

Institutions that can issue a Public Identification Document include:

  • contact points of public administration – Czechpoint (Czech Post, regional offices, municipal offices, offices of municipal districts or city districts, but also embassies abroad) or
  • Notaries

How can you deliver the charter to us?

  • Hand the original to our sales representative or
  • Send the original to Direct Fidoo a.s. Pod Dráhou 1636/1 Prague 7 – Holešovice 170 00 or
  • At your request, the notary/contact point of the public administration will deliver the public deed including the annex to the Direct Fidoo data box (amq9upt)

The following information must be included in the document:

  • which institution issues the public document
  • at whose request the deed is executed – indicate the name of the company:
    Direct Fidoo a.s.
  • for what purpose the deed is executed – please specify:
    conclusion of the Framework Agreement
  • details of the identified person
  • declaration of the identified person
  • signature of the identified person, including date and place of signature
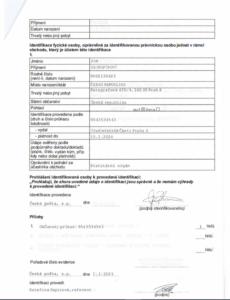
  • attachments – a copy of the main identification document (ID card) must be included in the Public Deed
  • the date, place and signature of the person who made the identification

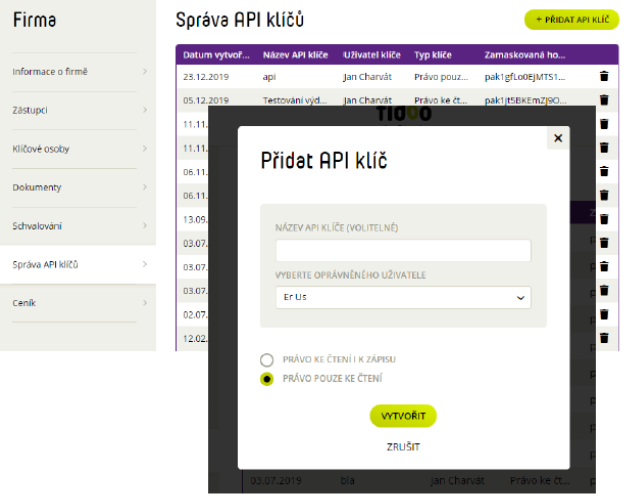
3. Remote identification without physical presence

In order to make the contracting process as simple as possible for our clients, we offer the option of remote identification. Identification is completed upon receipt of the identification payment from the company bank account and presentation of two photo IDs.

For remote identification you need:

  • a double-sided copy of the ID card of the managing director(s),
  • a double-sided copy of another identification document (passport, driving licence) of the managing director(s),
  • a printscreen or scan of the bank account statement that is held in your company’s name and that will be included in the Framework Agreement
  • making an identification payment

What are identification documents?

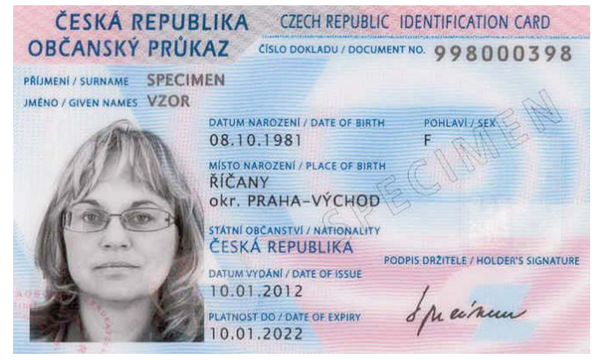
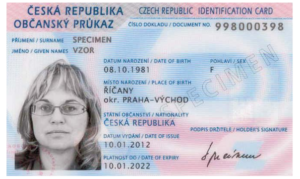
1. Main identity document

An identification document is, for example, an identity card or passport.

Both the front and back of the document are required. A copy of the identification document must comply with the following requirements:

  • the document must be valid on the date of signing the contract,
  • the document must be in JPG, PNG, GIF or PDF format,
  • one document maximum 10 MB
  • the document must not be defaced by any watermark,
  • the document must not have a cut corner
  • the individual information, including the photograph, must be legible and clearly identifiable
  • individual information must not be blurred or blackened,

Front side of the identification document

Back of the identification document

2. Supporting document

As a supporting document, Direct Fidoo accepts e.g. passport, driving licence, birth certificate, marriage certificate or insurance card, for example.

The same rules apply for these documents as for the main document.

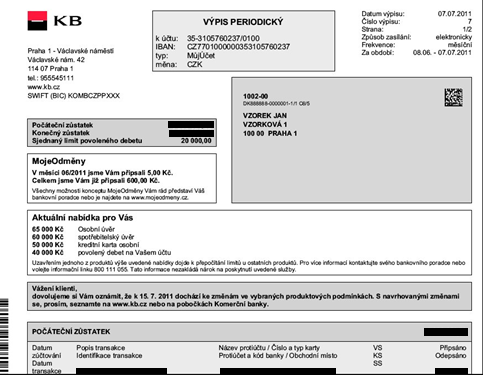
3. Bank account statement

A copy of the bank statement must meet the requirements of an identification document and be up-to-date (no older than 3 months).

A copy of the statement must contain the following information:

  • company name
  • address
  • bank account number
  • banking institution

A copy of the statement may have the following information blacked out:

  • Initial balance
  • Final balance
  • Individual transactions

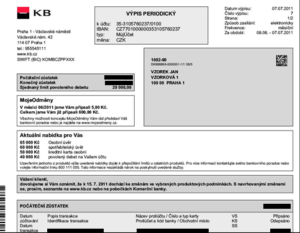
Example of a bank statement

Making an identification payment

You will receive instructions for making the identification payment as part of the contracting process.

In the event that the identification payment is not credited to our account within 5 working days of the conclusion of the Framework Agreement, this Agreement shall be null and void.

Fidoo API and its settings

The API is secured using a statically generated key that uses the permissions of the user whose Fidoo account it was generated under. Depending on the permission level of this user, the API key can be used for read-only or write/change data.

The ability to generate API keys is by default assigned to the user in the role of Main Administrator in Fidoo. If you want to grant this right to another user, you need to contact our Client Care Center and request activation of the key generation option.

  1. The main administrator or a user with granted rights can see the section Settings → Company → API key management, where he can generate one or more API keys.

    Fidoo API settings
    Fidoo API settings
  2. The API key must be inserted into the X-Api-Key header in the queries being called.

Test data

If you are interested in a test environment, please contact our Client Care Center(info@fidoo.com). We will be happy to set up a Fidoo test environment that can communicate with the test API from the repository: https://api-preprod.fidoo.com/v2